Showing posts with label Learning. Show all posts

Sunday, October 3, 2021

What is a Relay and How it Works?

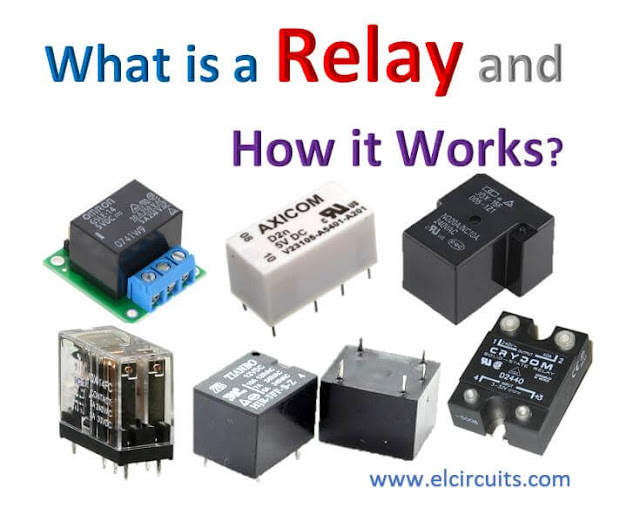
Fig 1. - What is a Relay and How it Works?

What is a relay?

A relay is an electromagnetic switch used to turn a circuit on and off by a low-power electrical signal, or when multiple circuits need to be controlled by a single signal.

We know that most high-end devices for industrial applications require relays for their effective operation.

Relays are simple switches that are electrically and mechanically operated. Relays consist of an electromagnet and a series of contacts. The switching mechanism is carried out with the help of the electromagnet.

There are also other functional principles for their operation. However, they differ depending on the application.

Why use a Relay?

A relay is mainly used where only a low power signal can be used to control a circuit. It is also used when only one signal can be used to control many circuits.

The use of relays began with the invention of the telephone. They played an important role in exchanging calls in telephone exchanges. 

They were also used in long distance telegraphy. They were used to transmit the signal coming from one source to another destination.

After the invention of computers, they were also used for logical operations and other switching operations

The most demanding applications of relays are those that require high power to be activated such as electric motors, high current switches and so on. Such relays for these applications are called contactors.

Architecture of Relay

A relay consists of only five main components. These are:

  • Electromagnetic Coil 
  • Mobile Armature
  • NC, NA, COM Switching points
  • Magnetic core

In Figure 2 below, show the actual construction of a simple relay.

Fig.2 - Basic Architecture of the 5-pole Relay

It is an electromagnetic relay with a coil of wire surrounded by an iron core. A very low reluctance path for the magnetic flux is provided for the movable armature with the articulator and also for the switch point contacts NO, NC, COM.

The movable armature is connected to the yoke, which is mechanically connected to the switching point contacts. 

These parts are secured by means of a spring. The spring is used to create an air gap in the circuit when the relay is de-energized.

How does the relay work?

The function of the relay can be better understood by explaining the diagram in Figure 3 below. 

Fig. 3 - Relay schematic diagram 

The diagram shows an internal sectional view of a relay. A control coil as shown.

As soon as current flows through the coil, the electromagnet is energized and a magnetic field is created. 

Shortly thereafter, the upper contact arm is attracted by the lower fixed arm, closing the contacts, which causes the moving blade to switch from the normally closed "NC" circuit, to normally open "NO".

Immediately after the circuit is de-energized, the contact will move in the opposite way and make the NO circuit to the NC.

Once the coil current is switched off, the moving armature is returned to its initial position by a force. This force is almost equal to half the magnetic force.

Relays are manufactured mainly for two basic applications. One is the low voltage application and the other is the high voltage application. 

For low voltage applications, more emphasis is given to reduce the noise of the whole circuit. For high voltage applications, they are primarily designed to reduce a phenomenon called Arc Flash.

Relay Base

The base for all relays is the same. Take a look at the 5-pole relay shown in Figure 4 below. There are two colors shown. The yellow color represents the control circuit and the green color represents the load circuit. 

Fig. 4 - Relay Structural Diagram

A small control coil is connected to the control circuit. A switch is connected to the load. This switch is controlled by the coil in the control circuit. Now let us look at the various steps that take place in a relay.

Relay energized (ON)

As shown in Figure 4, a magnetic field is created when current flows through the coils represented by the yellow pins. 

This magnetic field causes the Mobile Armature to switch, completing the circuit between the terminals NO and COMMON.

De-energized relay (OFF)

As soon as the current flow through the coil pins ends, the strength of the magnetic field also ends and the Mobile Armature is set to its natural state by the spring force opposing the strength of the magnetic field and returns to its initial state by closing the NC and COMMON contacts again.

Simply put, when voltage is applied to the coil's current pins, the electromagnet is activated, creating a magnetic field that closes the pins NO and COMMON, creating a closed circuit between NO and COMMON

When no voltage is applied to the coil pin, there is no electromagnetic force and therefore no magnetic field. Therefore, the switches remain in their natural closed state NC and COMMON.

Switching poles

Relays have exactly the function of a switch. Therefore, the same concept is applied. A relay is said to switch one or more poles. Each pole has contacts that can be switched in three ways. They are:

Normally open contact [NO]

The NO contact is also called the manufacturer's contact. It closes the circuit when the relay is inactive or not energized, and breaks the circuit when the relay is active or energized.

Normally Closed contact [NC]

The NC contact is also referred to as the normally closed contact. It is the opposite of the NO contact. When the relay is energized, the NC circuit is broken. When the relay is deactivated, the NC circuit is reconnected.

Changeover Contacts (CC) / Double-throw [DT]

This type of contact is used to control two types of circuits. They are used to control both a NO contact and a NC contact with a common terminal. 

Depending on the type, they are called normally closed before normally open and normally open before normally closed.

Relays can be used to control multiple circuits by a single signal. A relay connects one or more poles, any of which can be actuated by energizing the coil.

Relays are also referred to by names such as.

Single Pole Single Throw [SPST]

The SPST relay has a total of four terminals. These two terminals can be connected or disconnected. The other two terminals are needed to connect the coil.

Single Double Pole Throw [SPDT]

The SPDT relay has a total of five terminals. Two of them are the coil terminals. There is also a common terminal that can be connected to one of the other two terminals.

Double Single Pole Throw [DPST]

The DPST relay has a total of six terminals. These terminals are divided into two pairs. This allows them to act as two SPSTs controlled by a single coil. Of the six terminals, two are coil terminals.

Double Double Pole Throw [DPDT]

The DPDT relay is the largest relay. It has mainly eight relay terminals. These two rows are designed to be interchangeable with terminals. They are designed to function like two SPDT relays controlled by a single coil.

Relay Applications

A relay circuit is used to perform logic functions. They play a very important role in providing critical safety logic.

Relays are used to provide time delay functions. They are used to delay and retard the closing of contacts.

Relays are used to control high voltage circuits using low voltage signals. Similarly, they are used to control high current circuits with the help of low current signals.

They are also used as protective relays. By this function, all faults can be detected and isolated during transmission and reception.

Overload Relay Application

Overload relay is an electromechanical device used to protect motors from overload and power failures. Overload relays are installed on motors to protect them from sudden current spikes that can damage the motor. 

An overload relay operates on the principle of current over time and is different from circuit breakers and fuses where a sudden trip occurs to shut down the motor.

The most commonly used overload relay is the thermal overload relay, which uses a bimetallic strip to shut down the motor. 

This range is set to make contact with a contactor and doubles in size as the temperature rises due to excessive current flow. The contact between the range and the contactor causes the contactor to de-energize and limit the power to the motor by shutting it down.

Another type of overload motor is the electronic type, which continuously monitors the motor current, while the thermal overload relay shuts down the motor based on the temperature rise/heating of the belt.

All commercially available overload relays have different specifications, the most important of which are actual range and response time. Most of them are designed to restart automatically when the motor is restarted.

Relay selection

When choosing a particular relay, you should consider a few factors. Are they:

Protection

  • Various protection measures such as contact protection and coil protection must be considered. Contact protection helps reduce arcing in circuits with inductors. Coil protection helps reduce the overvoltage that occurs during switching.

  • Look for a standard relay with all regulatory approvals.

  • Switching Time - Order high speed switching relays if you want one.

  • Ratings - There are current and voltage ratings. Current ratings range from a few amps to about 3,000 amps. For voltage ratings, they range from 300 volts AC to 600 volts AC. There are also high voltage relays with a voltage rating of about 15,000 volts.

If you have any questions, suggestions or corrections, please leave them in the comments and we will answer them soon.

Subscribe to our blog!!! Click here - Elcircuits.com!!!

My Best Regards!!!

Friday, October 1, 2021

Arduino: Lesson 6 - How to use Analog Output to fade an LED

Fig. 1 - Arduino: Lesson 6 - How to use analog output to fade an LED

Welcome to Lesson 6 - Basic Arduino Course

In today's lesson, we will learn how to use an analog output to increase and decrease the brightness of a LED. In this example, we will use the analogWrite() function, which triggers a PWM wave on an Arduino pin.

We will use PWM to vary the brightness of a LED as an example, but nothing prevents us from also using it to drive a motor and control its speed, the concept is the same.

The analogWrite() function triggers a square wave at the specified duty cycle until the next analogWrite() call.

The frequency of the PWM signal is around 490 Hz on most Arduinos, however on Arduino Uno and some similar boards, pins 5 and 6 use a frequency of about 980 Hz.

On most Arduino boards with ATmega168 or ATmega328 chips, this function works on pins 3, 5, 6, 9, 10 and 11. On the Arduino Mega this function works on pins 2 to 13 and 44 to 46.

Hardware Required

  • Arduino Board
  • LED
  • 200 ohms resistor
  • Jumper Wires
  • Protoboard (optional)

The Circuit

The circuit is quite simple, we connect a LED in series with a 220 ohm resistor used to limit the current in the LED as we learned in the previous lessons, and we connect the PWM 9 port of the Arduino UNO as shown in Figure 2 below.
Fig. 2 - Using an analog output to fade an LED - tinkercad.com

We use a Protoboard to facilitate the connections, but you can also connect the wires directly to the Arduino.

The Code

The analogWrite() function writes an analog value to the Arduino pin. It is important to remember that this output is not a pure analog output that we can use to generate a pure sine wave, but this output is a PWM wave control.

When we execute the call to the analogWrite() function, the pin will generate a constant square wave with the specified duty cycle until the next function call.

After building the circuit, connect your Arduino board to your computer, launch Arduino Software (IDE), copy the code below and paste it into your Arduino IDE. But first let us understand the code line by line. 

  • In Line 3, we declared ledPin to digital Pin 9 where we connect the LED to the digital Pin 9
  • In Line 5we enter the void setup() function. This function is read only once when the Arduino is started.
  • In Line 6, we define Port 9 as the output, using the pinMode(); function;

01
02
03
04
05
06
07
08
//Arduino: Lesson 6 - How to use Analog Output to fade an LED

int ledPin = 9;                                // LED connected to digital pin 9

void setup() {                                // This function is called once when the program starts
pinMode(ledPin, OUTPUT);        // Set the digital pin as output:

}
  • In Line 09, we enter in the loop() function does precisely what its name suggests, and loops consecutively.
  • In Line 11, the control structure For, is used to repeat a block of statements enclosed in curly braces. An increment counter is usually used to increment and terminate the loop.

  • In Line 12, we run the analogWrite() function, this function writes an analog value (PWM wave) to pin 9, in this case we are increasing the PWM value from 5 to 5, to increase the LED brightness up to the maximum value of 255.
  • In Line 13, we use the function delay(); to wait for 30 milliseconds to see the dimming effect.

1
...
09
10
11
12
13
14
15
// Arduino: Lesson 6 - How to use Analog Output to fade an LED

void loop() { // The loop function runs over and over again forever
  
  for (int fadeValue = 0; fadeValue <= 255; fadeValue += 5 { // fade in from min to max in increments of 5 points:
   analogWrite(ledPin, fadeValue);          // sets the value (range from 0 to 255)
   delay(30);                                             // wait for 30 milliseconds to see the dimming effect
  } 
//------------------------------------- www.elcircuits.com --------------------------------------------
  • In Line 16, the control structure For, is used to repeat a block of statements enclosed in curly braces. An increment counter is usually used to increment and terminate the loop.
  • In Line 17, we run the analogWrite() function, this function writes an analog value (PWM wave) to pin 9, in this case, we are decreasing the PWM value from 5 to 5, to decrease the LED brightness to the minimum value of 0.
  • In Line 18, we use the function delay(); to wait for 30 milliseconds to see the dimming effect.
1
...
16
17
18
19
20
21
// Arduino: Lesson 6 - How to use Analog Output to fade an LED

for (int fadeValue = 255; fadeValue >= 0; fadeValue -=5){ //fade out from max to min in increments of 5 points
   analogWrite(ledPin, fadeValue);           // sets the value (range from 255 to 0)
   delay(30);                                              // wait for 30 milliseconds to see the dimming effect
  }
}
//------------------------------------- www.elcircuits.com --------------------------------------------
Below you can see the full code, which we can be copying and pasting into your Arduino IDE, and uploading to Arduino.

The complete code is showed in the sketch below!

1
2
3
4
5
6
7
8
9
10
11
12
13
14
15
16
17
18
19
20
21
// Arduino: Lesson 6 - How to use Analog Output to fade an LED

int ledPin = 9;                                          // LED connected to digital pin 9

void setup() {                                           // This function is called once when the program starts
  pinMode(ledPin, OUTPUT);                 // Set the digital pin as output:

}
void loop() { // The loop function runs over and over again forever
  
  for (int fadeValue = 0 ; fadeValue <= 255; fadeValue += 5) {  // fade in from min to max in increments of 5 points:
   analogWrite(ledPin, fadeValue);           // sets the value (range from 0 to 255)
   delay(30);                                              // wait for 30 milliseconds to see the dimming effect
  } 

    for (int fadeValue = 255 ; fadeValue >= 0; fadeValue -= 5) {  // fade out from max to min in increments of 5 points:
   analogWrite(ledPin, fadeValue);           // sets the value (range from 0 to 255)
   delay(30);                                              // wait for 30 milliseconds to see the dimming effect
  }
}
//------------------------------------- www.elcircuits.com --------------------------------------------

Next Lesson

Previous Lesson

If you have any questions, suggestions or corrections, please leave them in the comments and we will answer them soon.

Subscribe to our blog!!! Click here - elcircuits.com!!!

My Best Regards!!!

Monday, September 20, 2021

How to Wiring the Neutrik Combined Connector

Fig. 1 - Schematic XLR / P10 Neutrik NCJ6FI-S Female Combined Plug Connection


Today we will give you a concise explanation of how to wire the Neutrik XLR/P10 NCJ6FI-S Combined Female connector.

This type of female connector supports two types of connectors, the connector XLR, known as "Plug Canon", which is used to connect microphones and mixers.

And the TRS (Tip-Ring-Sleeve. Tip-Ring-Cover) plug for stereo, and for mono, TS (Tip-Sleeve. Tip-Cover), the old and known as; Banana Plug, or P10, are the ones used in musical instruments, guitar, keyboard, bass, etc...

And in Figure 2 below, you can see the front and back of the XLR/P10 Female NCJ6FI-S Neutrik Combination Connector. Its structure is made of solid plastic and its connectors are located on the back of the plug.
Fig. 2 - Conector Neutrik NCJ6FI-S

You might also be interested in:

Arrangement of the pins on the Neutrik connector

There are 4 models for this type of Neutrik connector, differing in the number of pins. We will deal with all models, but the one we will use today is the most common one found on the market.

For this connector model, we have the pinout in Figure 3 below. There are 7 Contact Pins, each of which is shown with its initials, both for the TRS "P10" input, 3 pins, and for the XLR "Canon" input, 4 pins.
We begin by understanding the type of connection we will be making.
Fig. 3 - Schematic Diagram Neutrik XLR/P10 Connection

Connecting to the TRS connector

If you need to use the channels of Neutrik Female Plug separately, we have arranged the connections separately to make it easier to understand the application of the type of configuration you will be putting together. For connections using only the TRS input, we have provided the schematic diagram in Figure 4 below:
Fig. 4 - Schematic Diagram of Connection with P10 Input Connector

For connections using only the XLR input, the so-called "Plug Canon", you will find a schematic diagram in figure 5 below:
Fig. 5 - Schematic diagram of the connection with the XLR input connector.
Having understood these two configurations, it is easy to understand how to prepare a Female Neutrik Connector with the configuration of the two connected in parallel, that is, the Combined Neutrik Connector. 

This "Obvious" setting is the most commonly used. The connections using the XLR and TRS inputs are arranged in the schematic diagram in Figure 6 below:
Fig. 6 - Diagrama esquemático ligação Conector Combinado, Entrada XLR/P10


The connectors are basically a combination of the P10 connectors and the XLR connectors. You just need to "jump" the pins as shown in the table below:
  • 1 of the XLR with pin S of the TRS 
  • 2 of the XLR with pin T of the TRS 
  • 3 of the XLR with pin R of the TRS.
These numbers and these letters are arranged on the back of the Neutrik connector, and to make it easier for those who do not have much experience with these connectors, acronyms, etc. In Figures 7 and 8 you will find, one by one, the illustrations of the connectors to be connected to the P10 plugs, stereo and mono.

Pin arrangement Combined Neutrik with P10 TRS connector - Stereo Version:

Fig. 7 - Schematic diagram of the Combined Connector connection, P10 TRS input.

Arrangement of pins Combined Neutrik with P10 TS connector - Mono Version:

Fig. 8 - Schematic diagram of Combined Connector connection, P10 TS Mono Input

Main features of the Neutrik NCJ6FI-S connector

  • Combined XLR and TRS connector socket
  • Slim "front-end" design
  • Saves rack space by combining 2 connectors in a single housing
  • Horizontal or vertical PCB mounting or rigid wire soldering
  • Fully standardized
  • Stereo or mono version
  • Very low line capacitance, therefore also suitable for digital audio
  • Mounting: Self-tapping plastic and threaded screws of configuration 2.9 x 1.06 and tri-ondular (screw A)
Below is a table detailing the features of the NCJ6FI-S Female Connector, which can be purchased from the product manufacturer.


Product
TitleNCJ6FI-S
Connection typeDoble XLR / P10
Genrefemale
Electrical Characteristics 
Resistance of Contacts < 10 mΩ (XLR)
Resistance of Contacts < 20 mΩ (Plug)
Dielectric Capacity 1,5 kVdc
Insulation Resistance > 10 GΩ (initial)
Rated current per contact 7,5 A (XLR)
Rated current per contact 7,5 A (Plug)
Rated Voltage < 50 V
Mechanical Characteristics
Insertion Force≤ 25 N
Withdrawal force≤ 25 N
Lifetime> 1000 Placement/Removal Cycles
Panel Thicknessmax. 7 mm 0.27"
Wire SizeS/T
Assembly DirectionBack Part
Material
Contact Plating0.2 µm Ao ligation on 2 µm Knot
ContactsBronze (CuSn6)
InsertionPolyamide (PA 6.6 30% GR)
Locking ElementIron Ck67
Environmental
Temperature Range-30 °C to +80 °C

If you have any questions, suggestions or corrections, please leave them in the comments and we will answer them soon.

Subscribe to our blog!!! Click here - elcircuits.com!!!

My Best Regards!!!