Showing posts with label IC Amplifier. Show all posts

Monday, September 6, 2021

1W Amplifier for Stereo Headphone using TDA2822 IC + PCB

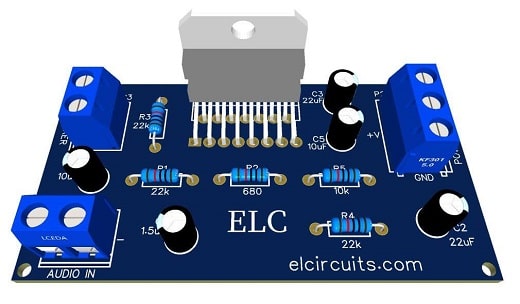
Fig. 3 - PCB - 1W Amplifier for Stereo Headphone with IC TDA2822M

Simple headphone amplifier with few external components that is easy and inexpensive to assemble. This IC is designed for amplifying portable devices such as CD players, portable radios, small speakers, etc.

First of all, we will use it to amplify the audio signal for headphones, that is, we will build a headphone amplifier, whether to listen to music from a mobile phone, connect instruments to study, such as electric guitar, bass guitar, ukulele, guitar, or any other audio signal that needs to be amplified. 

You might also be interested in:

The main component is the TDA2822, a monolithic integrated circuit in an 8-pin lead  Mini-dip package. It is intended for use as a dual audio power amplifier in portable audios.

FEATURES

  • Dual Low-voltage power amplifier 
  • Supply voltage down to 1.8V 
  • Low crossover distortion                                
  • Low quiescent current z Bridge or stereo configuration
The maximum input voltage of this IC is 15V DC, so do not apply more than 15V to the IC. The circuit volume can be adjusted using a 47K doble potentiometer is used in the circuit.

The schematic diagram circuit of the 1W audio Amplifier for Stereo Headphone with IC TDA2822M  is shown in Figure 2 below.

Fig. 2 - 1W Amplifier for Stereo Headphone with IC TDA2822M

Material List

  • IC1 .................. Integrated Circuits TDA2822M
  • R1, R2 ............ 1/4W / 4.7Ω Resistor 
  • C1, C2 ............ 1uF - 25V Electrolytic capacitor 
  • C3, C4, C5 ..... 100uF - 25V Electrolytic Capacitor 
  • C6, C7 ............ 0.1uF Polyester capacitor
  • J1, J2 .............. 3.5mm Audio Female Jack Connector 
  • VR1 ................ 47KΩ  Double Potentiometer
  • P1 ................... Connector 2 screw terminal 5mm 2 Pins
  • Others ............ Wires, Solders, pcb, etc.

We offer for download the necessary materials for those who want to assemble with PCI - Printed Circuit Board, the files in PNG, PDF and GERBER files for those who want to send for printing.

Download:


If you have any questions, suggestions or corrections, please leave them in the comments and we will answer them soon.

Subscribe to our blog!!! Click here - elcircuits.com!!!

My Best Regards!!!

Monday, June 21, 2021

68W Hi-Fi Audio Power Amplifier using LM3886T IC + PCB

Fig. 1 - PCB  68W Hi-Fi Audio Power Amplifier - IC LM3886T

The LM3886 is a high-performance audio power amplifier capable of delivering 68W of continuous average power to a load and 38W into with 0.1% THD+N from 20Hz–20kHz

The performance of the LM3886, utilizing its Self Peak Instantaneous Temperature (°Ke) (SPiKe) protection circuitry, puts it in a class above discrete and hybrid amplifiers by providing an inherently, dynamically protected Safe Operating Area (SOA)

SPiKe protection means that these parts are completely safeguarded at the output against over-voltage, under-voltage, over-loads, including shorts to the supplies, thermal runaway, and instantaneous temperature peaks. The IC pinout is shown in Figure 2 below.
Fig. 2 - Pinout IC LM3886T

The LM3886 maintains an excellent signal-to-noise ratio of greater than 92dB with a typical low noise floor of 2.0μV. It exhibits extremely low THD+N values of 0.03% at the rated output into the rated load over the audio spectrum, and provides exceptional linearity with an IMD (SMPTE) typical rating of 0.004%.

Features

  • 68W cont. avg. output power into 4Ω at VCC = ±28V
  • 50W cont. avg. output power into 8Ω at VCC = ±35V
  • 38W cont. avg. output power into 8Ω at VCC = ±28V
  • 135W Instantaneous Peak Output Power Capability
  • Signal-to-Noise Ratio ≥ 92dB
  • An Input Mute Function
  • Output Protection from a Short to Ground or to the Supplies via Internal Current Limiting Circuitry
  • Output Over-Voltage Protection against Transients from Inductive Loads
  • Supply Under-Voltage Protection, not Allowing Internal Biasing to Occur when |VEE| + |VCC| ≤ 12V, thus Eliminating Turn-On and Turn-Off Transients
  • 11-Lead TO-220 Package

The Power Supply

The power supply is Symmetrical, for those who will use a 4Ω Loudspeaker, the 2x 20Vac transformer is recommended, because when rectified, it is around 28Vdc.

And for those who will use it at 8Ω, it is recommended the 2x 25Vac transformer, which when rectified, is 35Vdc on average.

The recommended transformer power is about 120W, this means that the transformer current is on average 3.5 Amperes, for mono, if it's stereo, do the duplication, that is, 8 Amperes. 

A good size heat radiator is necessary, since the IC LM3886 works in class AB, there is a great loss in heat at full power, and the recommended filter capacitors is 2 x 10.000uF/50V

The output inductance is formed by 15 turns of enameled wire, with a diameter of approximately 0.5mm, wound around the resistor R8 of 10Ω 1W. The complete schematic diagram is shown in Figure 3 below.
Fig. 3 - Schematic  68W Hi-Fi Audio Power Amplifier - IC LM3886T

Components List

  • U1 ..........................LM3886 Integrated Circuit
  • R1, R3 .................. 2.2K ohms - 1/8W - Resistor  - (red, red, red, gold)
  • R2, R4, R5, R6 ..... 47K ohms - 1/8W - Resistor  - (yellow, violet, orange, gold)
  • R7 ......................... 4R7 ohms - 1W - Resistor  - (yellow, violet, gold, gold)
  • R8 ......................... 10 ohms - 1W - Resistor  - (brown, black, brown, gold)
  • C1 ......................... 2.2uF - 25V - Electrolytic capacitor 
  • C2 ......................... 680pF Polyester capacitor 
  • C3 ......................... 470uF - 50V - Electrolytic capacitor 
  • C4, C8 .................. 100nF - ceramic/polyester capacitor
  • C5, C7 .................. 1000uF - 50V - Electrolytic capacitor
  • C6 ......................... 47pF - ceramic/polyester capacitor
  • C9 ......................... 220nF - ceramic/polyester capacitor
  • C10 ....................... 100uF - 50V - Electrolytic capacitor
  •  L1 ........................ 0.7uH Inductor - *See Text 
  • P1, P2 ................... Block 5mm 2 Pin weldable terminal Connector
  • P3 ......................... Block 5mm 3 Pin weldable terminal Connector
  • Others ................... PCP,  Heat Sink, Wires, Solders and Etc.

We are offering the PCI - Printed Circuit Board, in GERBER, PDF and PNG files, for you who want to do the most optimized assembly, either at home.

If you prefer in a company that develops the board, you can is downloading and make the files in the Download option below.

Files to download, Direct Link:

Click on the link beside: GERBER, PDF and PNG files

If you have any questions, suggestions or corrections, please leave them in the comments and we will answer them soon.

Subscribe to our blog!!! Click here - elcircuits.com!!!

My Best Regards!!!

Wednesday, May 19, 2021

40W Stereo 14.4V Car Audio Power Amplifier using TDA8560Q IC + PCB

Fig. 1 - PCB 40W Stereo Car Amplifier TDA8560Q

For Portuguese Version, Click Here!

This is a super easy to build Stereo Car Audio Power Amplifier circuit, due to the number of external components being few, it makes this amplifier quite viable for those who want to build a power amplifier and super simple and quick to do.

The TDA8560Q is an integrated Class-B output amplifier in a 13-lead Single-In-Line (SIL) power package.

This Car Audio Amplifier Circuit gives an output power 2×40W / 2 Ω in BTL configuration. The device is primarily developed for car radio applications.  

The TDA8560Q contains two identical amplifiers and can be used for bridge applications. The gain of each amplifier is fixed at 40 dB. Special features of the device are as follows.

You might also be interested in:

Mode select switch (pin 11)

  • Standby: low supply current (<100 µA)
  • Mute: input signal suppressed
  • Operating: normal on condition.

Since this pin has a very low input current (<40 µA), a low cost supply switch can be applied. To avoid switch-on plops, it is advised to keep the amplifier in the mute mode during ≥100 ms (charging of the input capacitors at pin 1 and pin 13).

The schematic diagram of the Car Amplifier Circuit, is in Figure 2 below, it is a very simple circuit to build, with few external components, however, it is a very powerful circuit, which provides 80W in two 2 Ohms Speakers.

Fig. 2 - 40W Stereo 14.4V Car Audio Power Amplifier - IC TDA8560Q

The operating voltage of this circuit can vary between 6V to 18V DC, which opens the possibilities of use in amplifier for; Residential Sound, Car Stereo, Boombox, Computer Speaker, among other types of portable audio amplifiers ... Since it has a common power supply and low power voltage, this circuit amplifier is ideal for these purposes.

Components List

  • U1 ..................TDA8560Q Integrated Circuit
  • R1, R2, R3 .... 10K ohms - 1/8 W Resistor - (brown, black, orange, gold)
  • C1, C2 ........... 470nF Polyester Capacitor
  • C3 .................. 47uF - 35V Electrolytic capacitor 
  • C4 .................. 2200uF - 35V Electrolytic capacitor
  • C5 .................. 100nF Ceramic Capacitor
  • RP1, RP2 ....... 20K ohms Potentiometer 
  • JP1, JP2 .......... Female RCA Connectors to PCB
  • P1, P2, P3 ....... PCB Terminal Blocks
  • Others ............. Wires, Welds, Posts, PCB, Etc.

We are making available the files containing the PCB, the Schematic Diagram, the PDF, GERBER, and JPG, and providing a direct link to download for free in a direct link, "MEGA".

Direct link to download

Click in the link  to download the Files: PCB Layout, PDF, GERBER, JPG

If you have any questions, suggestions or corrections, please leave them in the comments and we will answer them soon.

Subscribe to our blog!!! Click here - elcircuits.com!!!

My Best Regards!!!

Wednesday, April 7, 2021

320W Power Audio Amplifier, Powered with 14.4V - 2Ω using TDA7560 IC + PCB

Fig. 1 - 320W Power Audio Amplifier - IC TDA7560


This is a simple high power amplifier circuit, with 320W divided into 4 outputs with 2Ω. This amplifier is capable of providing 50 Watts of power per channel, totaling 200W of sound power. 

But, what title does it say is 320W? That's right, the amplifier circuit with TDA7560 for which it is the base of this amplifier, was designed to provide a maximum power of 80 Watts per channel with a load of 2Ω powered by 14.4V.

Which opens up great possibilities for those who do not usually use symmetrical power supply, and you can also use this circuit as an amplifier in your car.

Since the connected car provides approximately 14.4V that serves to charge the battery, and without taking into account that this circuit may also be being powered directly by 12V, which would be when the car is off.

Output Power Settings:

For 4Ω load

VS = 13.2V - THD 10% - 4 x 25 Watts
VS = 13.2V - THD 1% - 4 x 19 Watts
VS = 14.4V - THD 10% - 4 x 30 Watts
VS = 14.4V - THD 1% - 4 x 23 Watts

For 2Ω load

VS = 13.2V - THD 10% - 4 x 45 Watts
VS = 13.2V - THD 1% - 4 x 34 Watts
VS = 14.4V - THD 10% - 4 x 55 Watts
VS = 14.4V - THD 1% - 4 x 43 Watts

Maximum Power THD> 10%

VS = 14.4V - 4Ω - 4 x 50 Watts
VS = 14.4V - 2Ω - 4 x 80 Watts

Characteristics

  • Hi-Fi Distortion Class
  • Low output noise
  • St-by function
  • Mute function
  • Auto Mute in min. Supply voltage detection
  • Supply voltage range from 8 to 18Volts
  • Low external component account:
  • Internally fixed gain (26db)
  • No external compensation
  • Without Bootstrap Enablers
  • 0.35A onboard pre-driver

Standby and Mute

The Standby and Mute installations are both compatible with CMOS, if you do not want to use a direct connection with the respective Vs pins.

You can use standard low power transistors to drive the Mute and Stand-By pins if you do not want to use the ports CMOS or even use microprocessors.

The R-C set should always be used to smooth the transitions to avoid audible transient noise. In Stand-By mode, the time constant to be assigned to achieve a transition practically free of pop-ups must be slower than 2.5V / ms.

In Figure 2 below, we have the schematic diagram of the Audio Amplifier with 320W Power, powered with 14.4V with IC TDA7560, as we can see, it is a very simple circuit, compared to its insight, so small.

However, quite powerful, and this is great because it makes assembly a lot easier for those who do not have great experiences with electronics and also wants to participate in this excellent and incredible world of electronics.
Fig. 2 - Audio Amplifier with 320W - Powered with 14.4V with CI TDA7560

The power supply must provide a current of at least 7 Amperes. It is important to remember that the maximum supply voltage allowed by this IC is 18 Volts, if we exceed this supply voltage we can burn the Integrated Circuit.

Components List

  • CI 1 ................................ TDA7560 Integrated Circuit
  • R1 .................................. 10KΩ Resistor (brown, black, orange, gold)
  • R2 .................................. 47 KΩ Resistor (yellow, violet, orange, gold)
  • C1, C2 ........................... 1μF Ceramic capacitor / polyester
  • C3, C4, C5, C6, C9 ....... 0.1μF Ceramic / polyester capacitor 
  • C7 .................................. 470nF Ceramic / polyester capacitor 
  • C8 .................................. 47μF - 25V Electrolytic capacitor 
  • C10 ................................ 2.200μF - 25VElectrolytic capacitor 
  • CN 1, 2, 4, 5, 6, 7, 8 ...... 2-Pin PCB Terminal Blocks - EK500V-XXP
  • CN 3 .............................. 5-Pin Card-to-Cable Connector
  • Others ............................ Printed Circuit Board, tin, wire, etc.
The PCB - Printed Circuit Board, has its dimensions of; 83.439mm width by 58.166mm depth, and, We are making available for Download the necessary materials for those who want to assemble with PCB, the files in PNG, PDF and GERBER files for those who want to send for printing.

Download:

Direct Link: PNG, PDF, GERBER files

This post is an authorized copy of our partner www.fvml.com.br. For those who want to follow step by step the assembly of this amplifier and the sound tests, you can access the video in Portuguese on the FVML Youtube channel by accessing below.

If you have any questions, suggestions or corrections, please leave them in the comments, and we will answer them soon.

Subscribe to our blog!!! Click here - elcircuits.com!!!

My Best Regards!!!

Thursday, March 25, 2021

100W RMS Audio Amplifier using TDA7294 IC + PCB

Fig. 1 - Printed Circuit Board Amplifier 100W with TDA7294


We'll assemble an excellent power amplifier, with excellent sound quality, with 100W RMS output power, with symmetrical power supply. The circuit has a wide range in the supply voltage, and we will be providing the printed circuit board for you to download.

Integrated Circuit

The TDA7294 is an Integrated Circuit with Class AB audio output, it has its Multiwatt encapsulation. It was specifically designed for high quality sound applications, such as: home micro-systems, guitar cubes, high-end televisions. 

Thanks to the wide voltage range and the high current capacity, it's able to provide the highest power in loads of 8 ohms or 4 ohms, even with low supply voltage input, with high voltage rejection circuit.

The built-in locking function with activation delay simplifies remote operation, avoiding noisy changes when pressing the On/Off button.

Characteristics

  • Wide range of supply voltage (± 10V to ± 40V)
  • DMOS output amplification step
  • High Output Power (Musical 100W)
  • Mute and Stand-by functions
  • Very low harmonic distortion
  • Short circuit protection
  • Thermal protection with automatic shutdown

The layout of the schematic diagram is just below in Figure 2, for which we have the entire configuration of the amplifier with TDA7294.
Fig. 2 - Schematic diagram 100W RMS Audio Amplifier IC TDA7294

List of materials

  • U1 .................. Integrated Circuit TDA7294
  • R1, R3, R4 .... Resistor 22K (red, red, orange, gold)
  • R2 ................. Resistor 680Ω (blue, gray, brown, gold)
  • R5 ................. 10K resistor (brown, black, orange, gold)
  • C1 .................. Electrolytic capacitor 1.5μF - 35V
  • C2, C3 ........... Electrolytic capacitor 22μF - 63V
  • C4, C5 ........... Electrolytic capacitor 10μF - 63V
  • P1, P3............. 2-Pin Card-to-Cable Connector
  • P2 .................. 3-Pin Card-to-Cable Connector
  • Others ............ Printed Circuit Board, tin, wire, etc.

Power supply

The power supply must be at least 5 AmperesSymmetrical, with good filtration, with a minimum voltage of 10 Volts and a maximum of 40 Volts

Knowing that using the minimum voltage, you will not reach the maximum power of the amplifier, because it needs a higher voltage to supply the declared power.

In this amplifier model, is used a Symmetric Power Supply type, that is; power [+ VCC GND | -VCC].

Download

We are making available for download the necessary materials for those who want to assemble with the PCB - Printed Circuit Board, the files in PNG, PDF and GERBER files, for those who want to send for printing.

Direct link to download

Click in the link below to download the Files: PCB Layout, PDF, GERBER

If you have any questions, suggestions or corrections, please leave them in the comments and we will answer them soon.

Subscribe to our blog!!! Click here - elcircuits.com!!!

My Best Regards!!!