Showing posts with label Transistor Amplifier. Show all posts

Friday, April 1, 2022

140W Class AB Amplifier using MJL4281A and MJL4302A transistors with PCB

Fig. 1 - 140W Class AB Amplifier using MJL4281A and MJL4302A transistors with PCB

Discover High-Fidelity Sound: Build a 140W Class AB Amplifier with MJL4281A and MJL4302A Transistors along with PCB

This is a simple 140W Class AB amplifier using MJL4281A and MJL4302A transistors, which stands out for its simplicity, quality, and is a moderate amplifier to build.

You can be making two of these boards, to be able to work with two outputs, in stereo, and make an amplifier with total power of 280W RMS.

This amplifier works with a simple power supply, that is, a unipolar, non-symmetric power supply.
 
This amplifier circuit can be used in almost any type of application that requires a simple amplifier, with great performance, low noise and low distortion, and good sound quality.

It uses 2 output power transistors, NPN transistor MJL4281, and PNP transistor MJL4302, forming a pair of complementary transistors.

You might also be interested in:

The Power Transistors

The MJL4281A and MJL4302A transistors are power transistors designed for high power audio, they have a collector-emitter sustaining voltage of 350 V.

It's high gain – 80 to 240, with the hFE = 50 (min) 8A collector current, and a low harmonic distortion, which makes a transistor excellent for high power operation and audio quality.

The Circuit

This circuit has a moderate complexity, it is not recommended for those who have no experience in electronics and in the assembly of amplifier circuits.

You should have minimum knowledge in an intermediate to advanced level to assemble this type of power amplifier.

The schematic diagram of the complete circuit, shown in Figure 2 below, is a very robust amplifier, with great sound quality and very stable, responding very well at all audible frequencies, with little attenuation in the 20Hz to 20Khz hearing frequency range.

Fig. 2 - Schematic Diagram 140W Class AB Amplifier using MJL4281A and MJL4302A transistors

Power supply

The power supply is symmetrical, with a voltage of +45V | 0V | -45V, and direct current, with at least 6 Amps of current. For continuous use, we recommend 4A, especially if used in a subwoofer.

In Figure 3 below, we have a suggestion for a power supply that we use in our projects. In this article, besides having the schematic diagram with the Printed Circuit Board, you will understand how to easily calculate your own Power Supply, with the desired voltage.

You can in the link below:

Fig. 3 - Symmetrical Power Supply for Power Amplifiers

Components List

  • Semiconductor
    • Q1, Q2, Q3 .... 2N5551 NPN Transistor
    • Q4, Q6 ........... BD139 NPN Transistor
    • Q5, Q7 ........... BD140 PNP Transistor
    • Q8 .................. MJL4302A NPN Transistor
    • Q9 .................. MJL4281A NPN Transistor
    • LED1 ............. Light Emitter Diode (general use

  • Resistor
    • R1, R3 ........... 2K2Ω resistor (red, red, red, gold
    • R2, R4, R8 ..... 22KΩ resistor (red, red, orange, gold)
    • R5, R6 ........... 560Ω resistor (green, blue, brown, gold)
    • R7 .................. 1K2Ω resistor (brown, red, red, gold)
    • R9 .................. 1KΩ resistor (brown, black, red, gold)
    • R10, R11 ....... 3K3Ω resistor (orange, orange, red, gold)
    • R12, R13 ....... 220Ω resistor (red, red, brown, gold)
    • R14, R15 ....... 0.22Ω / 5W resistor (red, red, silver, gold)
    • R16 ................ 10Ω / 1W resistor (brown, black, black, gold
    • RP1 ................ 2K Potentiometer
  • Capacitor
    • C1 .................. 2.2uF / 25V electrolytic capacitor 
    • C2 .................. 330pF ceramic, polyester capacitor
    • C3, C5 ........... 100uF / 65V electrolytic capacitor 
    • C4, C6, C7 .... 100nF ceramic, polyester capacitor

  • Miscellaneous 
    • P1, P2 ............ Screw Terminal Type 5mm 2-Pin Connector
    • P3 .................. Screw Terminal Type 5mm 3-Pin Connector
    • Others ............ PCB, tin, wires, heat sink, soldering Iron, etc.

Printed Circuit Board - Download

We are offering the PCB – Printed Circuit Board, in GERBER, PDF and PNG files, for you who want to do the most optimized assembly, either at home.

If you prefer in a company that develops the board, you can is downloading and make the files in the Download option below.

Fig. 3 - PCB - 140W Class AB Amplifier using MJL4281A and MJL4302A transistors

Files to Download, Direct Link:

Click on the link beside: GERBER, PDF and PNG files

I hope you enjoyed it!!!

If you have any questions, suggestions or corrections, please leave them in the comments and we will answer them soon.

Subscribe to our blog!!! Click here - elcircuits.com!!!

My Best Regards!!!

Wednesday, February 23, 2022

160W High Fidelity Amplifier using Mosfet 2SK1058 and 2SJ162 with PCB

Fig. 1- 160W High Fidelity Amplifier using Mosfet 2SK1058 and 2SJ162 with PCB

This is a High Fidelity power amplifier, which uses 2 pairs of complementary MOSFETs output transistors, 2SK1058 and 2SJ162, which gives us a 160W power output. 

The circuit is simple to assemble, assuming you have advanced knowledge in electronics, you will be able to assemble this circuit without too much difficulty.

Basic operation of the circuit

This amplifier has a few many steps, and we could break down each component, but it would certainly be too long, so let's explain the main stage of the amplifier process. 

The 160W High Fidelity Amplifier circuit diagram is shown in Figure 2 below. It uses 4 output Mosfet power transistors, 2 transistors for the positive cycle and 2 transistors for the negative cycle.
Fig. 2 - Schematic Circuits 160W High Fidelity Amplifier using Mosfet 2SK1058 and 2SJ162

We will start with first Stage: 

It is formed by a pair of MPSA56 PNP transistors, they form the input of the differential amplifier. 
The main characteristic is to amplify the difference of the input signals without amplifying the common mode signal.

In the second stage:

We have two pairs of transistors, 2 NPN BD139 transistors and 2 PNP TIP140 transistors, they constitute a differential current source pair formed by the BD139 transistors pair. And with a current mirror formed by the BD140 transistors pair, in Cascade mode creating a telescopic amplifier stage.

In the third stage:

It is formed by the 4 Output MOSFETs transistors, two N-channel type transistors 2SK1058 and other two P-channel type transistors 2SJ162. They receive the signal from stage 2 which is a module in Cascade, as already explained, and deliver to the output load, formed by the speaker.

The output transistors should be equipped with a Heat Sink, and should be electrically separated with thermal insulators.

Power Supply

The power supply is a symmetrical source, +Vdc GND -Vdc, and must contain a current capable of supporting the total power of the Amplifier.

If the circuit is used in MONO mode "One channel", the recommended current is 4 Amperes. If a STEREO version "Two channels" is used, the current should be doubled to 8 Amperes.

The amplifier work voltage is ±45Vdc SYMMETRICAL, to be used with an output load between 4 to 8 ohms.

In Figure 3 below, we have a suggestion for a power supply that we use in our projects. In this article, besides having the schematic diagram with the Printed Circuit Board, you will understand how to easily calculate your own Power Supply, with the desired voltage.

You can in the link below:

Fig. 3 - Symmetrical Power Supply for Power Amplifiers

Components List

  • Semiconductors
    • Q1 .......................... MPSA56 PNP Transistor
    • Q3, Q4 ................... BD139 NPN Transistor
    • Q5, Q6 ................... BD140 PNP Transistor
    • Q7, Q8 ................... 2SK1058 N-Channel Mosfet Transistor
    • Q9, Q10 ................. 2SJ162 P-Channel Mosfet Transistor
    • D1, D2 ................... 1N4007 Diode

  • Resistor
    • R1, R2, R10 ................ 47KΩ (yellow, violet, orange, gold
    • R3, R4 ........................ 3K3Ω (orange, orange, red, gold)
    • R5 ............................... 1K2Ω  (brown, red, red, gold)
    • R6 ............................... 10KΩ  (brown, black, orange, gold)
    • R7, R8 ........................ 1KΩ (brown, black, red, gold)
    • R9 ............................... 2K2Ω (red, red, red, gold)
    • R11, R12, R13, R14 ... 47Ω (yellow, violet, black, gold)
    • R15, R16, R17, R18 ... 022Ω (red, red, silver, gold)
    • R19 ............................. 10Ω (brown, black, black, gold)
  • Capacitor
    • C1 ........................ 4.7uF / 65V Electrolytic Capacitor 
    • C2, C4, C5 ........... 470pF Ceramic Capacitor
    • C3 ........................ 47uF / 65V Electrolytic Capacitor 
    • C6 ........................ 100nF Ceramic Capacitor

  • Miscellaneous 
    • P1, P2 .......... 2-pin PCB soldering terminal blocks
    • P3 ................ 3-pin PCB soldering terminal blocks
    • Others ......... PCB, heat sink, power supply, wires, etc.


We are offering the PCB - Printed Circuit Board, in GERBER, PDF and PNG files, for you who want to do the most optimized assembly, either at home.

If you prefer in a company that develops the board, you can is downloading and make the files in the Download option below.

Fig. 3 - PCB 160W High Fidelity Amplifier using Mosfet 2SK1058 and 2SJ162

Files to download, Direct Link:


If you have any questions, suggestions or corrections, please leave them in the comments and we will answer them soon.

Subscribe to our blog!!! Click Here - elcircuits.com!!!

My Best Regards!!!

Wednesday, February 16, 2022

Powerful Mini Audio Amplifier using only 5 Transistors with PCB

Fig 1 -  Powerful Mini Audio Amplifier using only 5 Transistors with PCB

This is a simple amplifier that uses only 5 transistors, and provides good power, by our tests, we get close to 90W, and amazingly enough, it has a very good sound given its ultra simplicity.

The circuit is quite simple, and very easy to building, which makes it a great option for those who want to build an amplifier with good power and great cost, because it uses discrete components, cheap and easy to acquire.

You might also be interested in:

The Amplifier Circuit

The amplifier circuit is very simple to assemble, as shown in Figure 2 just below, this amplifier is divided into three basic stages: 

  • The first is the pre-amplification stage: It is formed by a differential pair set of NPN 2N5551 transistors, they are working as differential pair, which gives a very good stability in the signal sent to the next stage.

  • The second is the driver stage: it is formed by the PNP TIP42 transistor, it is used as a current amplifier and serves to drive the output stage.

  • The third is the power stage: It is formed by a pair of differential power transistors, one is the NPN 2SC5200 and the other is the 2SA1943, they are in push-pull mode, configured to work in class AB, with base BIAS diodes.
  • Fig. 2 - Schematic diagram Powerful Mini Audio Amplifier using only 5 Transistors

Note

Place the power transistors on a heat-sink, because since you work with power, they will get hot, a small size radiator will help.

For those who like loud sound, to really force the amplifier to the maximum, it is recommended to put the BIAS diodes in series, on the heat sink along with the transistors. This will cause the base voltage to be controlled according to the temperature of the transistors.

Power Supply

The power is supplied through a 24 VAC transformer, after rectification the supply will provide 35 VDCThe current to power this amplifier is at least 3A, for those mounting two of these to form a stereo pair, you should double the current to 6 Amps. 

Component List

  • Semiconductor
    • Q1, Q2 .......... 2N5551 NPN Transistor 
    • Q3 ................. PNP BD140 Transistor
    • Q4 ................. 2SC5200 NPN Power complementary transistor
    • Q5 ................. 2SA1943 PNP Power complementary transistor
    • D1, D2, D3 ... 1N4007 Diode

  • Resistors
    • R1, R5 .......... 100K ohms Resistor - (brown, black, yellow, gold)
    • R2 ................. 6K8 ohms Resistor - (blue, gray, red, gold)
    • R3 ................. 620 ohms Resistor - (blue, red, brown, gold)
    • R4.................. 4K7 ohms Resistor - (yellow, violet, red, gold)
    • R6 ................. 1k5 ohms Resistor - (brown, green, red, gold)
    • R7, R8 ........... 0.22 ohms - 5W  Resistor - (red, red, silver, gold)
    • P1 .................. 10K ohm potentiometer

  • Capacitors
    • C1 ................ 2.2uF Polyester / Ceramic Capacitor
    • C2 ................ 47uF - 65V Electrolytic capacitor 

  • Miscellanies
    • P1 ................. Screw Terminal Type 5mm 2-Pin Connector
    • P2 ................. Screw Terminal Type 5mm 3-Pin Connector
    • J1 .................. Set of male connectors 2-Pin (Optional)
    • Other ............. PCB, Wires, Speaker, Heat Sink, etc.

Printed Circuit Board

In Figure 3, we provide the PCB - Printed Circuit Board, in GERBER, PDF and PNG files. These files are available for free download, on the MEGA server, in a direct link, without any bypass. 

All to make it easier for you to do a more optimized assembly, either at home, or with a company that prints the board. You can download the files in the Download option below.

Fig. 3 - PCB - Powerful Mini Audio Amplifier using only 5 Transistors

Files to download, Direct Link:

Click on the link beside: GERBER, PDF and PNG files

If you have any questions, suggestions or corrections, please leave them in the comments and we will answer them soon.

Subscribe to our blog!!! Click Here - elcircuits.com!!!

My Best Regards!!!

Tuesday, February 8, 2022

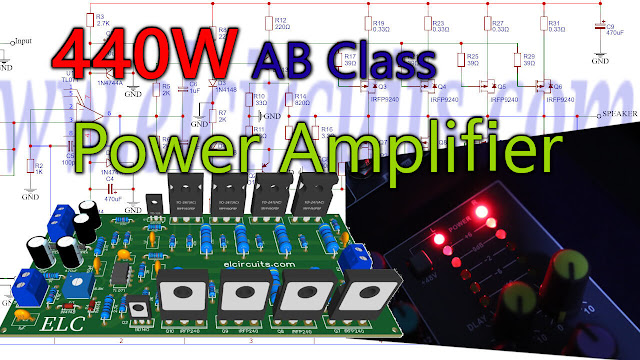
440W Class AB Power Amplifier using Mosfet IRFP9240 and IRFP240 Transistors with PCB


Fig. 1 - 440W Class AB Power Amplifier using Mosfet IRFP9240 and IRFP240 Transistors with PCB


This is a high performance power amplifier, which despite its simplicity in construction, in the tests performed, it presented parameters with great results, very close to what we call a HI-FI amplifier.

The Circuit Works

The complexity of the circuit is at an advanced level, it is not recommended for those who don't have experience in electronics and in assembling amplifier circuits, you must have minimal knowledge at an advanced level to assemble this type of power amplifier.

You might also be interested in:

The circuit diagram of the power amplifier is shown in Figure 2 below. It uses 8 output Mosfet power transistors, 4 transistors for the positive cycle and 4 transistors for the negative cycle. 

Fig. 2 - Schematic diagram 440W Class AB Power Amplifier using Mosfet IRFP9240 and IRFP240 Transistors 

The input circuit consists of a TL431 Op-Amp, it is used as a feed-forward preamplifier for the driver circuit units that produce a primary voltage gain at the output stage.

The circuit is divided into 2 identical half-cycles: one side for the positive half-wave of the signal fed through driver transistor Q1 NPN BD139, which feeds the output transistors (Q3, Q5, Q7, Q9 ) P-Channel IRFP9240, the other side for the negative half-wave of the signal fed through driver transistor Q2 PNP BD140, which feeds the output transistors (Q4, Q6, Q8, Q10) N-Channel IRFP240.

The Power Supply 

The power supply is of the symmetrical type, with a supply voltage of +55V | 0V | -55V, with a current of 10 Amperes, with good filtering. 

In Figure 3 below, we have a suggestion for a power supply that we use in our projects. In this article, besides having the schematic diagram with the Printed Circuit Board, you will understand how to easily calculate your own Power Supply, with the desired voltage.

You can in the link below:

Fig. 3 - Symmetrical Power Supply for Power Amplifiers

Components List

  • Semiconductors
    • U1 .......................... TL071 Integrated Circuit
    • Q1 .......................... BD139 NPN Transistor
    • Q2 .......................... BD140 PNP Transistor
    • Q3, Q4, Q5, Q6 ..... IRFP9240 Mosfet Transistor
    • Q7, Q8, Q9, Q10 ... IRFP240 Mosfet Transistor
    • D1, D2 ................... 1N4744 15V Zener diode
      D3, D4 ................... 1N4148 diode

  • Resistor
    • R1, R33 ................. 47KΩ (yellow, violet, orange, gold
    • R2 .......................... 1KΩ  (brown, black, red, gold)
    • R3, R4 .................... 2K7Ω (red, violet, red, gold)
    • R5, R6 .................... 2KΩ (red, black, red, gold)
    • R7 ........................... 6k8Ω Trimpot 
    • R8, R9 .................... 22KΩ (red, red, orange, gold)
    • R10, R11 ................ 33Ω (orange, orange, black, gold)
    • R12, R13 ................ 220Ω (red, red, brown, gold)
    • R14, R5 .................. 820Ω ( grey, red, brown, gold)
    • R16 ......................... 3.3Ω (orange, orange, gold, gold)
    • R17, R18, R21, R22, R25, R26, R29, R30 .... 39Ω (orange, white, black, gold)
    • R19, R20, R23, R24, R27, R28, R31, R32 .... 5W 0.33Ω (orange, orange, silver, gold)
  • Capacitor
    • C1, C5 .................... 100pF Ceramic Capacitor
    • C2, C6, C7 .............. 1uF Ceramic Capacitor
    • C3, C4, C9, C10 ..... 470uF / 65V Electrolytic Capacitor 
    • C8 ........................... 100nF Ceramic Capacitor


  • Miscellaneous 
    • P1 .......... 2-pin PCB soldering terminal blocks
    • P2 .......... 3-pin PCB soldering terminal blocks
    • Others .... Printed Circuit Board, heat sink, wires, etc.


We are offering the PCB - Printed Circuit Board, in GERBER, PDF and PNG files, for you who want to do the most optimized assembly, either at home, or if you prefer in a company that develops the board, you can is downloading and make the files in the Download option below.
Fig. 3 - 440W Class AB Power Amplifier using Mosfet IRFP9240 and IRFP240 Transistors

Files to Download, Direct Link:

Click on the link beside: GERBER, PDF and PNG files

If you have any questions, suggestions or corrections, please leave them in the comments and we will answer them soon.

Subscribe to our blog!!! Click Here - elcircuits.com!!!

My Best Regards!!!


Tuesday, December 14, 2021

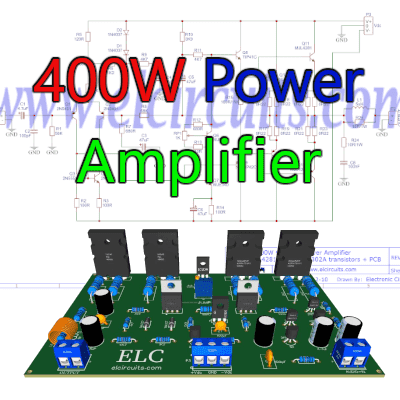
400W Class AB Amplifier using MJL4281A and MJL4302A transistors + PCB

Fig. 1 - 400W Class AB Amplifier using MJL4281A and MJL4302A transistors + PCB

The amplifier circuit is 400W RMS per channel, if you want to make two of these boards, they will be 800W RMS, that is, high power with great sound quality and stability.

This amplifier circuit can be used for virtually any type of application that requires an amplifier of high performance, low noise and low distortion, and excellent sound quality.

It uses 4 power transistors on the output; two NPN transistors MJL4281 and two PNP MJL4302, forming a double pair of complementary transistors.

You might also be interested in:

The Power Transistors

The MJL4281A and MJL4302A transistors are power transistors designed for high power audio, they have a collector-emitter sustaining voltage of 350 V, high gain - 80 to 240, with the hFE = 50 (min) 8A collector current. And a low harmonic distortion, which makes a transistor exceptional for high power operation and audio quality.

The Circuit

The complexity of the circuit is at an advanced level, it is not recommended for those who do not have experience in electronics and in assembling amplifier circuits, you must have minimal knowledge at an advanced level to assemble this type of power amplifier.

The schematic diagram of the complete circuit, shown in Figure 2 below, is a very robust amplifier, with great sound quality, and very stable, responding very well at all audible frequencies, with little attenuation in the auditory frequency range 20Hz to 20Khz.

Fig. 2 - Schematic 400W Class AB Amplifier using MJL4281A and MJL4302A transistors

Power supply

The power supply is symmetrical, with a voltage of +65V | 0V | -65V, and direct current, with at least 6 Amps of current. For continuous use, we recommend 8A, especially if used in a subwoofer.

In Figure 3 below, we have a suggestion for a power supply that we use in our projects. In this article, besides having the schematic diagram with the Printed Circuit Board, you will understand how to easily calculate your own Power Supply, with the desired voltage.

You can in the link below:

Fig. 3 - Symmetrical Power Supply for Power Amplifiers

Components List

  • Q1, Q2 ............ 2N5401 PNP Transistor
  • Q3, Q4, Q5 ..... 2N5551 NPN Transistor
  • Q6, Q7 ............ MJE340 NPN Transistor
  • Q8 ................... TIP41 NPN Transistor
  • Q9 ................... TIP42 PNP Transistor
  • Q10, Q11 ......... MJL4281 NPN Transistor
  • Q12, Q13 ......... MJL4302 NPN Transistor

  • D1, D2 ............. 1N4007 Diode

  • R1 .................... 56KΩ resistor (green, blue, orange, gold)
  • R2, R3, R14 ..... 100Ω resistor (brown, black, brown, gold)
  • R4 .................... 47KΩ resistor (yellow, purple, orange, gold)
  • R5 .................... 120Ω resistor (brown, red, brown, gold)
  • R6 .................... 1K2Ω resistor (brown, red, red, gold)
  • R7, R12 ............ 680Ω resistor (blue, gray, brown, gold)
  • R8 ..................... 68KΩ resistor (blue, gray, orange, gold)
  • R9, R11 ............ 4K7Ω resistor (yellow, red, purple, gold)
  • R10 .................. 3K9Ω resistor (orange, white, red, gold)
  • R13 .................. 10Ω resistor (brown, black, black, gold)
  • R15 .................. 180Ω / 1W resistor (brown, gray, brown, gold)
  • R16 to R23 ....... 0.22Ω /5W resistor (red, red, gold, silver)
  • R24, R25 .......... 10Ω / 1W resistor (brown, black, black, gold
  • RP1 .................. 1K Potentiometer
  • C1 ........................ 4.7uF / 25V electrolytic capacitor 
  • C2, C7 ................. 100pF ceramic, polyester capacitor
  • C3, C4, C5, C6 .... 47uF / 50V electrolytic capacitor 
  • C8 ........................ 100nF ceramic, polyester capacitor

  • L1 ................ 5uH - Air Core Coil 10 Turns 18AWG, 3/8" Core

  • P1, P2 ........... Screw Terminal Type 5mm 2-Pin Connector
  • P3 ................. Screw Terminal Type 5mm 3-Pin Connector
    • Others ............ PCB, tin, wires, heat sink, soldering Iron, etc.

    We are offering the PCB - Printed Circuit Board, in GERBER, PDF and PNG files, for you who want to do the most optimized assembly, either at home. 

    If you prefer in a company that develops the board, you can is downloading and make the files in the Download option below.

    Fig. 4 - PCB - 400W Class AB Amplifier using MJL4281A and MJL4302A transistors

    Files to download, Direct Link:

    Click on the link beside: GERBER, PDF and PNG files

    If you have any questions, suggestions or corrections, please leave them in the comments and we will answer them soon.

    Subscribe to our blog!!! Click Here - elcircuits.com!!!

    My Best Regards!!!


    Monday, May 24, 2021

    Simple 100W Power Amplifier using TIP142 NPN and TIP147 PNP transistors + PCB

    Fig 1 - PCB 100W Power Amplifier - TIP142 and TIP147 Transistors

    This is a low complexity amplifier, which can be easily assembled by anyone who has basic knowledge in electronics.

    This amplifier works with a Class B output stage with a complementary output pair formed by the TIP142 and TIP147 Darlington Transistors.

    Operation

    The input stage, is formed by a differential pair Q1 and Q2, which are two PNPs A733 transistors, the Q1 transistor receive the input signal for amplification, and Q2 receives the Feedback signal.

    Thus assembling a signal loop making with the differential amplifier to control the signal giving stability to the amplifier and avoiding distortion in the circuit.

    The second stage consists of a TIP41 transistor, which functions as a Drive, which receives the signal from the differential pair and amplifies it to delivery a sufficient current at the base of the output transistors.
    This amplifier has an output power of approximately 100 watts, to get this output power will depend on the Power Supply voltage, with a supply voltage of + 50V / - 50V, with a current of 3A.

    In our tests, it was possible to get a little more than 100W. The schematic diagram circuit, is in Figure 2 below, it is a very simple circuit to build, with few external components.

    However, be careful, it works with a total voltage of 90V, be careful not to change any component polarity, don't short the amplifier circuit.
    Fig 2 - Schematic Simple 100W Power Amplifier with  TIP142 NPN and TIP147 PNP transistors

    Power supply

    The power supply for this circuit amplifier is symmetrical, in our tests a Transformer with a +36V 0V -36V AC, center-tape was used, with a current 3 Amperes, after the CA voltage goes through the rectification, it will average 50V DC.

    Components List

    • Semiconductor 
      • Q1, Q2 .... A733 - PNP transistor 
      • Q3 ........... TIP41C - NPN transistor
      • Q4 ........... TIP142 - NPN power transistor 
      • Q5 ............TIP147 - PNP power transistor 
      • D1, D2 .... 1N4007 - Diode 

    • Resistors 
      • R1, R2 ..... 22K ohms - 1/8W - Resistor  - (red, red, orange, gold)
      • R3 ........... 1K5 ohms - 1/8W - Resistor  - (brown, green, red, gold)
      • R4 ........... 220 ohms - 1/8W - Resistor  - (red, red, brown, gold)
      • R5 ........... 27K ohms - 1/8W - Resistor  - (red, violet, orange, gold)
      • R6 ........... 27 ohms - 1/8W - Resistor  - (red, violet, black, gold)
      • R7, R8 .... 3K3 ohms - 1W - Resistor  - (orange, orange, red, gold)
      • R9, R10 ... 022 ohms - 3W - Resistor  - (red, red, gold, silver)

    • Capacitors
      • C1 .......... 2.2uF - 25V - Electrolytic capacitor 
      • C2 .......... 100uF - 63V - Electrolytic capacitor 
      • C3 .......... 10uF - 63V - Electrolytic capacitor

    • Miscellaneous 
      • P1, P2 ..... Block 5mm 2 Pin weldable terminal Connector
      • P3 ........... Block 5mm 3 Pin weldable terminal Connector
      • Others .... Printed Circuit Board, Wires, Solders, Etc.

    We are offering the PCI - Printed Circuit Board, in GERBER, PDF and PNG files, for you who want to do the most optimized assembly, either at home.

    If you prefer in a company that develops the board, you can is downloading and make the files in the Download option below.

    Files to download, Direct Link:

    Click on the link beside: GERBER, PDF and PNG files

    If you have any questions, suggestions or corrections, please leave them in the comments and we will answer them soon.

    Subscribe to our blog!!! Click here - elcircuits.com!!!

    My Best Regards!!!

    Friday, May 21, 2021

    200W RMS Power Amplifier using 2SC2500 AND 2SA1943 transistors + PCB

    Fig. 1 - 200W RMS Power Amplifier using 2SC2500 AND 2SA1943 transistors


    This Power Amplifier have a moderate sound quality, and it's a simple circuit to assemble, using 4 complementary output transistors, 2 x NPN 2SC2500 and 2 x PNP 2SA1943

    This amplifier is quite common to find and it has a good sound quality, uses specific power transistors for audio, making these amplifiers a good circuit amplifier to building.


    This is a power amplifier, posted by our partner fvml.com.br, we are authorized to replicate any post, so we took these posts from them and implemented the volume control and changed the layout a little. This partnership allows us to do this, and they are also free to repost our posts.

    The circuit is supplied with a symmetrical power supply and can be supplied with a voltage between 30V to 65V, for greater performance you must use the 60V, with at least current 4 Amperes.

    The schematic diagram is shown in Figure 2 below, it is a simple amplifier, and often found on the internet for sale, it has a good quality and complies with the promised power.
    Fig. 2 - 200W RMS Power Amplifier with 2SC2500 and 2SA1943

    Power supply

    The power supply for this circuit amplifier is symmetrical, in our tests a Transformer with a 42V - 0 - 42V center-tape was used, with a 5 Amperes current, you can use a lower current, up to 4 Amps minimum, which will play perfectly.

    Nothing prevents you from using a lower voltage, as this amplifier has a tolerance regarding its supply voltage, and can normally play "with loss in output power" with voltages ranging from 24V to 60V without too many problems.

    Components List

    • Q1, Q2, Q3 .................. A1015 - PNP transistor 
    • Q5, Q6 ......................... TIP41C - NPN transistor
    • Q4, Q7 ......................... TIP42C- PNP transistor
    • Q8, Q10 ....................... 2SC5200 - NPN power transistor 
    • Q9, Q11 ....................... 2SA1943 - PNP power transistor 
    • D1, D2, D3, D4, D5 .... 1N4007 - Diode 
    • P1 ................................ 47K - Potentiometer 
    • C1 ............................... 2.2uF - 25V - Electrolytic capacitor 
    • C2 ............................... 47uF - 63V - Electrolytic capacitor 
    • C3 ............................... 330pF - Ceramic / polyester capacitor 
    • C4 ............................... 100nF ceramic / polyester capacitor
    • R1 ............................... 10K ohms - 1 / 4W - Resistor  - (brown, black, orange)
    • R2 ............................... 18k ohms - 1 / 4W - Resistor  - (brown, gray, orange)
    • R3 ............................... 820 ohms - 1 / 4W - Resistor  - (gray, red, brown)
    • R4 ............................... 270 ohms - 1W - Resistor  - (red, violet, brown)
    • R5 ............................... 1K ohms - 1 / 4W - Resistor  - (brown, black, red)
    • R6 ............................... 18K ohms - 1 / 4W - Resistor  - (brown, gray, orange)
    • R7 ............................... 330 ohms - 1 / 4W - Resistor  - (orange, orange, brown)
    • R8 ............................... 56 ohms - 1W - Resistor  - (green, blue, black)
    • R9 ............................... 27 ohms - 1W - Resistor  - (red, violet, black)
    • R10, R11 .................... 6R8 ohms - 1W - Resistor - (blue, gray, gold)
    • R12, R13 .................... 100 ohms - 1W - Resistor  - (brown, black, brown)
    • R14, R15, R16, R17 ... 033 ohms - 5W - Resistor  - (orange, orange, gold)
    • R18, R19 .................... 10 ohm resistor - 1W - (brown, black, black)
    • B1, B2 ........................ WJ2EDGVC-5.08-2P Connector
    • B3 ............................... WJ2EDGVC-5.08-3P connector
    • L1 ............................... Coil - 5uH Air Core
    • Others ......................... Printed Circuit Board, Wires, Solders and Etc.

    We are offering the PCB - Printed Circuit Board, in GERBER, PDF and PNG files, for you who want to do the most optimized assembly, either at home.

    If you prefer in a company that develops the board, you can is downloading and make the files in the Download option below.

    Files to download, Direct Link:

    Click on the link beside: GERBER, PDF and PNG files

    If you have any questions, suggestions or corrections, please leave them in the comments and we will answer them soon.

    Subscribe to our blog!!! Click here - elcircuits.com!!!

    My Best Regards!!!

    Sunday, April 18, 2021

    300W RMS Power Amplifier - 2SC3858 and 2SA1494 Transistors + PCB

    Fig. 1 - PCB 300W RMS Power Amplifier - 2SC3858 and 2SA1494 Transistors


    This is a 300W RMS Power Amplifier using complementary power transistors 2SC3858 and 2SA1494, this circuit amplifier isn't so simple to building, it will be necessary to have at least a little experience in electronics.

    To set up this circuit, its complexity is moderate, but, if you haven't skills in electronics circuits, we advise you not to do it, however, if you really want to do it, call someone with experience, to help you.

    This amplifier has an excellent audio quality, and use four output power transistors, it reaches a sound power of 300W RMS under load of 4 ohms, powered with a symmetric power supply. You can check the schematic diagram in Figure 2 below.

    Fig. 2 - Schematic 300W RMS Power Amplifier - 2SC3858 and 2SA1494 Transistors

    Power Supply

    The power supply consists of a symmetrical transformer 45V - 0 - 45V center tape, 6 Amperes current supply, can be used. After rectified, we will have approximately 63Vcc at the output of the symmetrical power supply .

    Components list

    • Q1, Q2, Q3, Q5 ......... C1815 NPN Transistor
    • Q4 .............................. A1015 PNP Transistor 
    • Q7 .............................. TIP 42C PNP Transistor
    • Q8, Q9 ....................... 2SC3858 NPN Power Transistor
    • Q10, Q11 ................... 2SA1494 PNP Power Transistor
    • Q6 .............................. TIP41C NPN Transistor

    • D1 to D7 .................... 1N4148 diode, or equivalent diode 1N4001 
    • C1, C4 ......................... 2.2uF - 25V Electrolytic Capacitor   
    • C2 ............................... 220pF Polyester / Ceramic Capacitor 
    • C8 ............................... 100nF Polyester / Ceramic Capacitor 

    • R2, R10 ....................... 47k ohms resistor (yellow, violet, orange, gold)
    • R3, R5 ......................... 2.2k ohms resistor (red, red, red, gold)
    • R4 ................................ 270 ohms resistor (red, violet, black, gold)
    • R6, R7 ......................... 51K ohms - 1/2W resistor (green, brown, orange, gold)
    • R8, R9, ........................ 100 ohms resistor (brown, brown, black, gold)
    • R11 .............................. 470 ohms resistor (yellow, violet, brown, gold)
    • R12 .............................. 390 ohms resistor (orange, white, brown, gold)
    • R13, R14 ..................... 100 ohms - 2W resistor (brown, brown, black, gold)
    • R17, R18 ...................... 6R8 ohms - 1W resistor (blue, gray, gold, gold)
    • R15, R16, R19, R20 .... 100 ohms - 1W resistor (brown, brown, black, gold)
    • R21, R22, R23, R24 .... 0.33 ohms - 5W resistor (orange, orange, gold, gold)
    • R25 .............................. 22 ohms resistor (red, red, black gold)
    • R26 .............................. 10 ohms - 1W resistor - (brown, black, black. gold)

    • P1, P2 ....... 2 Pin - PCB Terminal Blocks - EK500V-XXP 20A - or equivalent
    • P3 ............. 3 Pin - PCB Terminal Blocks - EK500V-XXP 20A - or equivalent

    • L1 ............. 5uH - Air Core Coil 10 Turns 18AWG, 3/8" Core

    • Others ...... Loudspeaker, Wires, Solders and Etc.


    For those who want to download materials such as the schematic diagram in PDF, PCB Layout,  GERBER and JPG, we are providing a direct link to download all the material.

    Direct link to download

    Click in the link below to download the Files: PCB Layout, PDF, GERBER, JPG

    If you have any questions, suggestions or corrections, please leave them in the comments and we will answer them soon.

    Subscribe to our blog!!! Click here - elcircuits.com!!!

    My Best Regards!!!

    Thursday, April 1, 2021

    50W RMS Audio Amplifier with IRF530 and IRF9530 Mosfet + PCB

    Fig. 1 - PCB 50W Audio Amplifier

    For Portuguese version, click here!

    This circuit amplifier is very simple to building, however, although simple, it has an excellent audio quality, and with just two output transistors, it reaches a sound power of 50W RMS under load of 8 ohms, which is enough for a great home sound system, or for speakers for musical instruments ... the possibilities are endless.

    The first stage of the amplifier is a differential amplifier based on the transistors Q1 and Q2. Capacitor C2 is the input DC decouple, R1 limits the input current and capacitor C1 deflects unwanted high frequencies.

    You might also be interested in:

    The second stage is the drive stage composed of the transistor Q3 BC546, which supplies the output power stage, and the transistor Q4 is the bias regulating transistor, which, through the PR1 trimpot, adjusts the quiescent current in the transistors.

    The output stage is a complementary push-pull stage based on the IRF530 and IRF9530 MOSFETs. The output is coupled to the speaker using the L1 inductor

    The network composed in series by hairs, resistor R14 and capacitor C5, is intended to reduce output noise. And Capacitors C6 and C7 are power supply voltage filters. 

    For coil L1: Wrap 12 turns of enameled copper wire in a 1cm diameter without core.

    A Heatsink is required for MOSFETs. That should have the average dimensions of 8x4x4 inches will already work without problems.

    You can check the schematic diagram in Figure 2 below.

    Fig. 2 - 50 Watt Amplifier Circuit Diagram

    Power Supply

    The power supply consists of a symmetrical transformer 35Vcc - 0 - 35V center tape, with a current of 3 Amperes, a lower current, up to 2 Amperes minimum, can be used, which will play without any problems. 

    Nothing prevents you from using a higher or lower voltage, as this amplifier has a tolerance for the supply voltage, and can normally play "with small attenuations in the output power" with voltages ranging from 27V to 40V without too many problems.

    It also has great stability and we can use, if you have, a SMPS power supply, and this is clear with Center-Tape, that is to say a power supply with central socket.

    Component List

    • Q1, Q2 ................ 2N3906 Transistor (or BC558, A733)
    • Q3, Q4 ................ 2N3904 Transistor (or BC548)
    • Q5 ....................... IRF9530P Mosfet P Transistor
    • Q6 ....................... IRF530P Mosfet N Transistor

    • D1 ....................... 1N4007 Diode 

    • C1 ....................... 220pF ceramic / polyester capacitor  
    • C2, C3, C4 .......... 47uF - 35V electrolytic capacitor 
    • C5 ....................... 68nF ceramic / polyester capacitor 
    • C6, C7 ................ 470uF - 50V electrolytic capacitor 

    • R1, R8 ................ 4.7k ohms resistor (yellow, violet, red, gold)
    • R2, R7 ................ 47k ohms resistor (yellow, violet, orange, gold)
    • R3 ....................... 560 ohms resistor (green, blue, brown, gold)
    • R4 ....................... 15k ohms resistor (brown, green, orange, gold)
    • R5 ....................... 1.2k ohms resistor (brown, red, red, gold)
    • R6 ....................... 2.2k ohms resistor (red, red, red, gold)
    • R9 ....................... 10k ohms resistor (brown, black, orange, gold)
    • R10 ..................... 820 ohms resistor (gray, red, brown, gold)
    • R11, R12 ............ 2.7k ohms resistor (red, violet, red, gold)
    • R13, R14 ............ 680 ohms resistor (blue, gray, brown, gold)
    • R15 ..................... 10 ohm - 3W resistor - (brown, black, black. gold)

    • L1 ........................ 5uH - Air Core Coil 10 Turns 18AWG, 3/8" Core

    • RP1 ..................... 1K ohms variable resistor - Trimpot 

    • Others ................. Loudspeaker, Wires, Solders and Etc.

    For those who want to download materials such as the schematic diagram in PDF, PCB Layout,  GERBER and JPG, we are providing a direct link to download all the material.

    Direct link to download

    Click in the link below to download the Files: PCB Layout, PDF, GERBER, JPG

    If you have any questions, suggestions or corrections, please leave them in the comments and we will answer them soon.

    Subscribe to our blog!!! Click here - elcircuits.com!!!

    My Best Regards!!!